|
Step one: Process print the full 60 to 90 seconds.
Step two: Prepare one tray with
140 degree F water & the second tray with room temperature water. Next, place a sheet of acetate or Mylar in the bottom of the room temperature tray.
Step three: Take your print &
immerse in the hot tray of water for several minutes until the emulsion starts to “bubble” off. Next, remove the print using tongs & place in cold water tray.
Step four: With the print in the
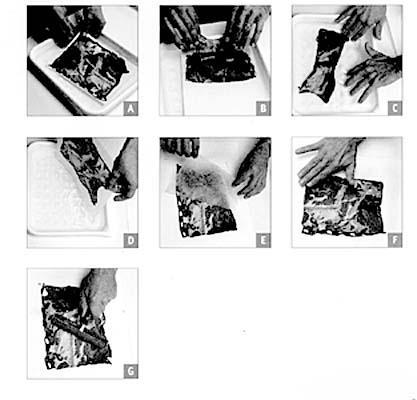
cold water, begin removing the emulsion from the print by gently pushing the edges of the print toward its center. (See A)
Once it releases, (See B) carefully turn the emulsion upside down in the water & discard the paper from the tray. (See C)
Step five: With
your fingers, grab the acetate on the bottom of the tray at the same time with the just removed emulsion goo. Carefully bring the emulsion/acetate sandwich in and out of the water
until most of the wrinkles in the materials flatten out. (See D)
You can work with the image now until you are satisfied with its look. Remove the sandwich from the water & with the acetate on the top, (See E)
place on the surface that you intend the image to rest.
Step six: Carefully
remove the acetate from the image. Now you can again manipulate the image with your fingers, moving it around the surface on the new surface. Then gently roll the image with
the brayer to remove all air bubbles & excess water. Hang the image up to dry. (See F & G)
Step seven: Flatten
image & if desired, manipulate with pastels, watercolors or other pigments or pencils. Protect from UV exposure.
|